
Certificate Authentication
Certificate authentication is the only authentication type doctor supports. doctor does not come with an application of its own, so you need to create your own Azure Entra ID app registration and authenticate with its certificate. Follow the next steps before you start using doctor.
Create the Entra ID app registration
Section titled “Create the Entra ID app registration”- Go to your Azure Portal
- Open Microsoft Entra ID
- Click on App registrations
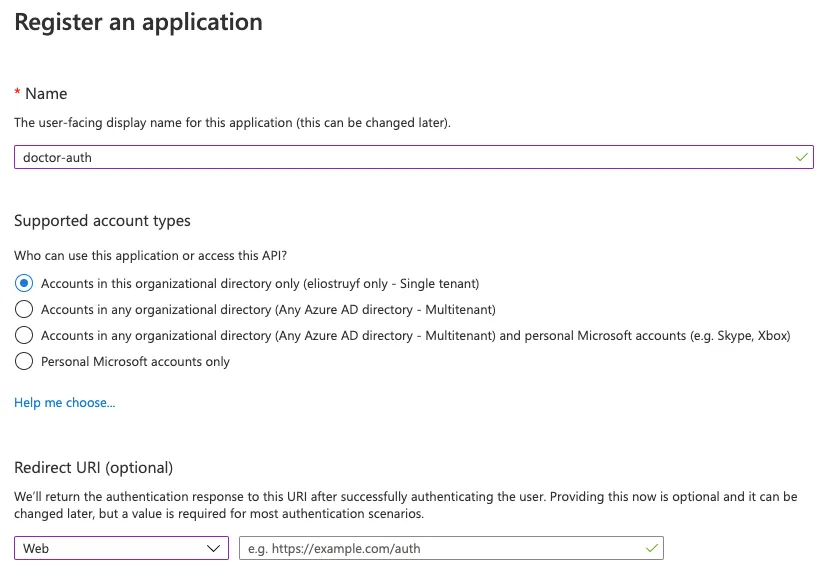
- Click on New registration
- Specify a name for your new Entra ID app
- Once the app is created, click on API Permissions and add the Sites.FullControl.All application permission scope from SharePoint
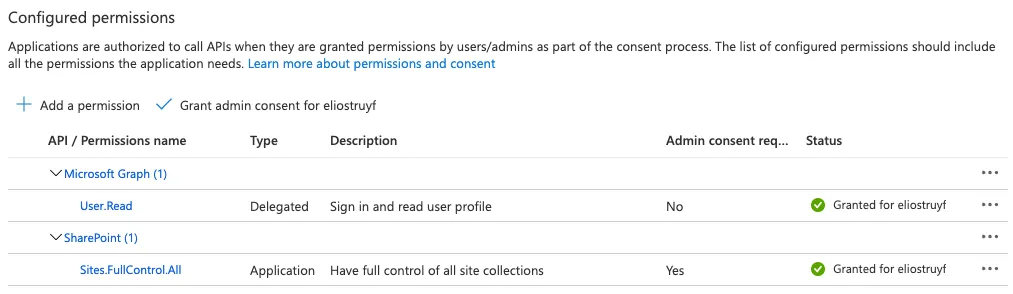
- If your pages set managed metadata columns, add the TermStore.Read.All application permission scope from SharePoint as well — see the term store
- Click on Grant admin consent for
, and accept
The term store
Section titled “The term store”doctor looks a managed metadata label up in the term store to find the term it stands for. Neither
Sites.FullControl.All nor rights on the site cover the term store, so without TermStore.Read.All
SharePoint refuses the lookup, the permissions report says no Read the term store, and every page
which sets a managed metadata column by its label is skipped.
Add it from SharePoint, not from Microsoft Graph: doctor reads the term store through the site
(_api/v2.1/termStore), with a SharePoint token. Reading is all it does, so TermStore.ReadWrite.All
is not needed, and neither is making the app a term store administrator. The permission is
tenant-wide, and works the same with Sites.Selected.
Not using managed metadata, or writing every term as { label, termGuid }, needs no term store access
at all.
Scoping the app to a single site
Section titled “Scoping the app to a single site”Sites.FullControl.All grants the app rights on every site in the tenant. If you would rather
give it access to only the site you publish to, add the Sites.Selected application permission
instead of Sites.FullControl.All, grant admin consent for it, and then grant the app rights on that
one site. With PnP PowerShell, as a tenant administrator:
Connect-PnPOnline -Url https://<tenant>.sharepoint.com/sites/<site> -Interactive
Grant-PnPAzureADAppSitePermission `  -AppId <appId> `  -DisplayName "<app name>" `  -Permissions FullControl `  -Site https://<tenant>.sharepoint.com/sites/<site>
FullControl on the site is what lets doctor do everything it can do: publish pages, set their
metadata, and manage the site navigation, the theme, the header and footer and the site logo — those
last ones need Manage Web rights, which Write does not include.
Write is enough to publish pages and set their metadata, and is the right choice when you do not
want the app to be able to change the look of the site.
Either way doctor reports what the account may and may not do before it writes anything, and skips
the site-level steps it is not allowed to take rather than failing the run — see
available permissions.
Create and upload the certificate
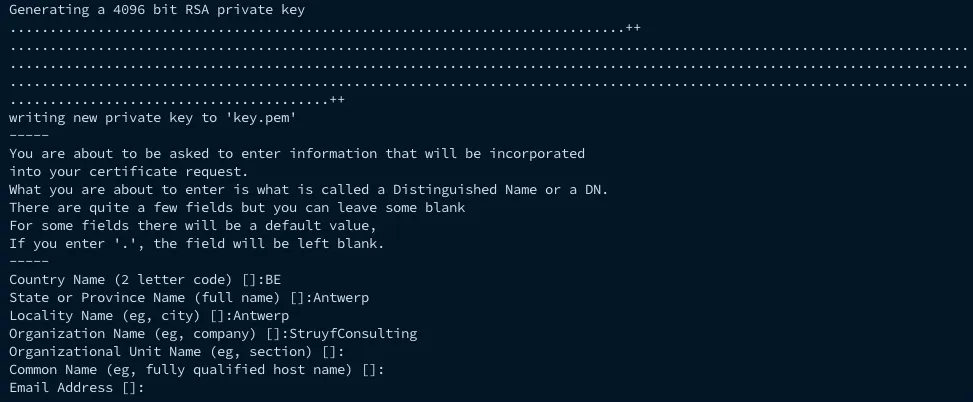
Section titled “Create and upload the certificate”- Open a command prompt, and run the following command in order to generate a certificate:
openssl req -x509 -newkey rsa:4096 -keyout key.pem -out cert.pem -days 366 -nodes
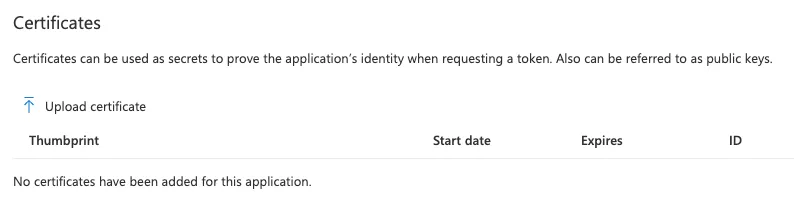
- Upload the cert.pem file to the Entra ID app under Certificates & secrets
- Convert the certificate into the
PKCSformat usingopenssl pkcs12 -export -out cert.pfx -inkey key.pem -in cert.pem- It will ask for a password. This is yours to pick. When you set one,
doctorneeds it too — see the certificate password.
- It will ask for a password. This is yours to pick. When you set one,
Use the certificate with doctor
Section titled “Use the certificate with doctor”Once you did the previous steps, you are ready to make use of the doctor tool. Pass the certificate with the --certificate <certificate> argument, which accepts the path to your certificate file, or its base64 encoded contents.
Using the path to the certificate file
Section titled “Using the path to the certificate file”Point the --certificate argument to your cert.pfx file. The path is relative to the folder from where you run doctor.
doctor publish --certificate ./cert.pfx --appId <appId> --tenant <tenant> --url <url>Next to .pfx, the .p12 and .pem extensions are supported as well.
Using the base64 encoded certificate
Section titled “Using the base64 encoded certificate”This is the easiest option to use in a CI/CD pipeline, as you can store the certificate as a secret.
- Get the
base64string from thepfxfile. On macOS:base64 -i cert.pfx. On Linux:base64 -w 0 cert.pfx— without-w 0the output is wrapped every 76 characters, and the line breaks end up in your secret. - Use the
Base64output as the input for the--certificate <certificate>argument.
doctor publish --certificate <base64String> --appId <appId> --tenant <tenant> --url <url>The certificate password
Section titled “The certificate password”When the certificate has a password, doctor takes it from the first of these that has one:
- the
--password <password>argument; passwordin thedoctor.jsonfile;- the
DOCTOR_CERTIFICATE_PASSWORDenvironment variable.
When none of them has one, doctor asks for it in the terminal, with the input shown as dots, and checks it against the certificate before it signs in. That is the most convenient on your own machine; the environment variable is the one for a CI/CD pipeline, where there is nobody to ask. Avoid --password where you can: the value is shown in the terminal that runs it, and stays in the process list for the whole run.
DOCTOR_CERTIFICATE_PASSWORD='…' doctor publish